Pin It button on image hover
Showing posts with label Damask Panel. Show all posts

Wednesday, 26 January 2022

Song Thrush (by Andy)


Hi All

Thank you for stopping by.

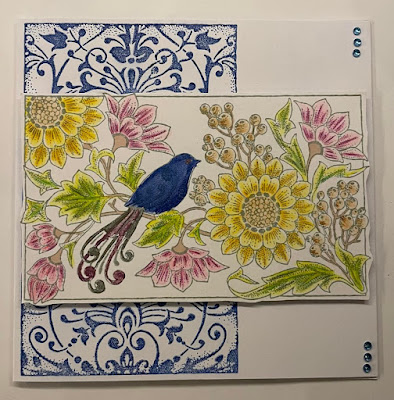
Another card for you this week featuring the Song Thrush and Damask Panel, which I think go quite nicely together. A card which can be used for a multiple of occasions. Enjoy.

You will need:

6" x 6" (15 x 15 cm) white card blank

White stamping card

Versafine Majestic Blue ink pad

Archival Watering Can ink pad

Water based markers

Gems

Pearlescent paint


Begin by taking the Damask Panel and inking up the Majestic Blue ink pad and stamp the image to the left of the card blank.

Stamp the Song Thrush with the Archival Watering Can on to the white stamping card.

Colour the image with your water based markers.

Paint some of the flowers with the pearlescent paint, but don't overdo it.

Once you are happy, cut out (be careful with the parts that go outside the shape).

Mount over the Damask Panel using foam pads if you so desire.

Add blue gems to top and bottom right corners of the card.

Job Done


Andy xx 

Monday, 24 January 2022

Give Me Five! (by Sandra)

Hello everyone, I am sharing the last of my cards made for the December show on The Craft Show.
This was a set of 5 stamps on an A4 sheet, but they are available individually on the Chocolate Baroque website as well.


This card uses the Damask Panel.
I stamped the panel onto red card and green card in VersaMark and gold embossing powder. I then cut each piece to make them square. I cut a square of gold card and glued on the green squares, before the glue dried I tucked in the red pieces in a pinwheel style. I added a gem to the centre and a couple of gold leaves.


My next card uses the Fountain Scene set. 
I stamped onto grey card with Archival ink and coloured in the scene with pencils. I cut two strips in design paper and mat and layered all pieces in black and adhered to a 7x5 card base.


My next card uses the Lady in Hat stamp.
I stamped the image in Memento ink and coloured with alcohol markers. I die cut the image with a circle die and then layered it onto a toning decorative doily die. I finished by adding some corner pieces.


My next card uses the beautiful Ophelia stamp.
I stamped Ophelia in Memento and coloured with alcohol markers. I found a 6x6 backing paper to which I added one of the tags from a previous show. I also added some stamping from Mini Scripts to the tag.


My last card today is Song Thrush.
I stamped in Memento and coloured with alcohol markers. I added some gloss to the berries.
I picked out the pinks and greens for my layers and adhered to a 7x5 card base.


 Thanks for looking

Sandra x

Saturday, 22 January 2022

Be Strong by Rachel

 Hello there,

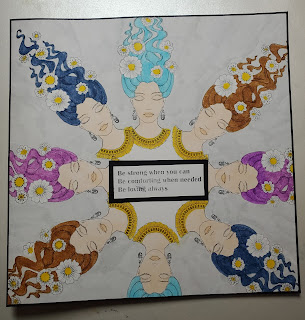
Rachel here today with my makes from the morning show later in December. I love all the stamps featured here - they are so very beautiful! In this first one I did a little repeat stamping then enjoyed colouring the Ophelias using water colour pens.


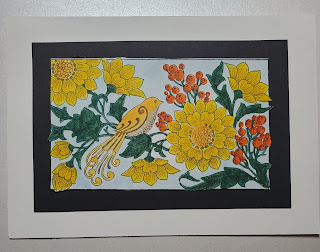
I used water colour pens again to colour this image and added it to a black background. I also added some repeat stamping to the card blank.


More water colour pens - you can just tell I was enjoying colouring these images in can't you?


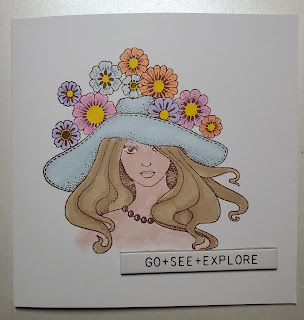
And yes - you've guessed it - more water colour pen colouring - this time with more pastel shades.


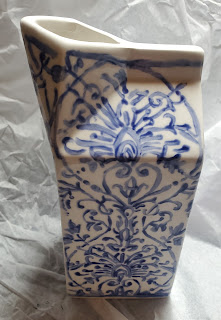
Finally I was a little more inventive and used this stamp to create a porcelain piece. I stamped in ink then overpainted in glaze before firing in the kiln at PottyRoos in Morecambe.

My penultimate post for Chocolate Baroque. I hope i have brought you a little inspiration!
Big hugs
Rachel x


Saturday, 8 January 2022

The Versatility of Damask by Doreen

The Versatility of Damask 

Firstly I would like to wish everyone a Happy New Year, I do hope you all enjoyed a good Christmas too.

My first projects today use the Damask Panel perfect for using in its own right or as a background which is how I chose to use this background which I have taken from my stash of Brusho pieces. I also used one of the many beautiful butterflies from the Chocolate Baroque selection.

I stamped the butterfly using a Versafine Clair Nocturne inkpad and then covered the whole of the stamp in Versamark the colour comes from Salvaged Patina and Kitsch Flamingo embossing glazes sprinkled onto the Versamark and heat embossed.


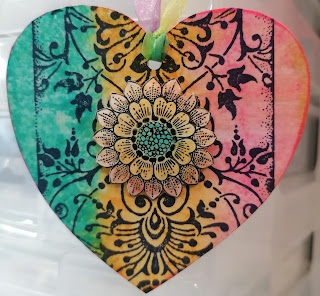
The second is a heart shaped sample using Distress Inkpads on an acrylic block which is spritzed with a little water and a swiping action straight across the Damask Panel onto the  background. Then I stamped the Song Thrush onto  a piece of card and painted using the same Distress Inkpad colours used for the background, then I fussy cut the large flower to decorate the Panel. Shape the flower and apply using Silicone Glue Gel to apply to the heart. Use a light varnish or spray to give a sheen and then put ribbon through hole to hang.


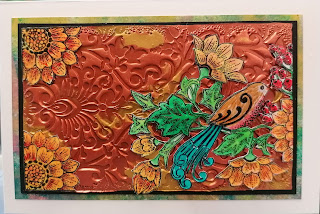
The final sample shows a background using a Soft Form Copper and a Gold Relief Paste applied directly to the stamp and left to dry overnight. I also used the Song Thrush to decorate this card just cutting out desired elements and applying to the background using a strong PVA glue.


Thank you for looking in today

Love Doreen

Tuesday, 4 January 2022

damask fountain (by Veronica)

Happy new year everyone, I hope you all had a good Christmas and lots of crafty goodies!

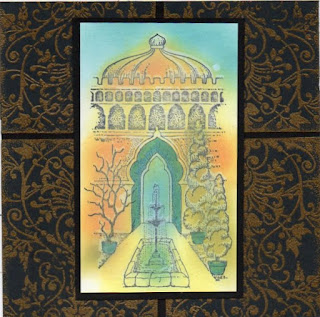
 I have a card to share today from the December shows, using both the Damask  Panel and Fountain Scene stamps - once i started playing with the damask stamp  I realised how it looked like  tiles from thwe moorish palaces in Spain, and the fountain seemed to match this perfectly.

The damask was stamped in versamark onto black card 4 times and gold embossed, then cut out and mounted onto more black card to make the background. thne trimmed down to fit the square card blank.

I sponged distress oxides onto a piece of white card roughly where i hoped the image would go, cossed my fingers, spritzed the stamp with water and stamped the image using a stamping platform. Moppedup with kitchen roll after a few minutes,dried with a heat gun, then overstamped using black versafine.. Added blue to the archway and plant pots, then trimmed it down, matted onto black card then in to the centre of the card.

Saturday, 1 January 2022

Happy New Year (by Judith)

Hello everyone, I hope that you are all keeping well and that you have had a good break over the festive period. I want to wish you all a very Happy New Year and all the very best for 2022. 

I am sharing a couple of projects with you today showcasing stamps that were featured on last month's shows on The Craft Store. The first is a little book made from a huge tag and I have used the Damask Panel stamped three times onto a Brusho background, using a metallic embossing powder.

I adhered the pieces onto the tag, and then cut away the excess from the third piece to get the tag shaped end. I added some pretty scrapbook paper on the inside of the tag, and punched the hole again at the top of the tag.


I scored inbetween the pieces, to create the book. I cut a few pages, and sewed them into the book using bookbinding thread. 


I added a piece of teal ribbon through the hole at the top of the tag to allow the book to be closed. This simply wraps around the book, and ties in a bow. These little books make great gifts, and are really quick to make. You could add any kind of pages; old book pages, kraft paper, watercolour paper, whatever you like, to create a mixed media book, but I used drawing cartridge for my sample.

My second project is an old project, which I thought I would share again. I stamped Ophelia onto a piece of Drawing Cartridge and masked the image with Masking Tissue. I coloured the background with Distress Inks and splattered the background with water, which I blotted with tissue. I added some stamping over the top using a stamp from the Texture Fragments stamp set. I stamped and embossed the fronds from the Underwater stamp set before removing the mask. I coloured Ophelia with pencils. I added some foliage from the Song Thrush Silhouette stamp, which coloured this way tie in with the flowers in her hair quite well. I added a bit of Glossy Accents to the centres of the flowers.

I will be back later in the month with more projects to share with you, take care and thanks for stopping by,


Judith xx


Monday, 22 July 2019

A Trio of Cards (by Debbie)

Hi everyone it's my turn on the Chocolate Baroque Design Team blog today. I love all the great background stamps from Chocolate Baroque and my first design is just concentrating on using Damask Panel.
I started out by embossing three times on white card using a black inkpad and clear embossing powder. That done I got out my Distress Inks and sponged Seedless Preserves and Salty Ocean softly over the entire area. I then cut around two pieces leaving a narrow border and then mounted onto black card. The card blank is a white DL used sideways and as you can see I've attached one piece at the bottom right of the card and then turned the other piece up the other way and mounted it slightly over the bottom piece and standing up over the top of the fold of the card. I used 3D foam tape for this piece to give some dimension. From the 3D piece I die cut the tag and layered it onto some white card. The sentiment which has been stamped onto a punched circle, comes from Words to Dazzle and Sparkle, and I've edged the circle with a black pen. To finish I've punched three smaller circles, edged them also with black, and attached to the bottom left.

For my next design I've used one of my favourites, the very useful Mosaic Flower. I'm a great fan of monochromatic designs using just one colour but this technique using a spot of colour works well too for quite a dramatic effect.
I've stamped twice and coloured one piece with simply red and grey pens. I've then punched four circles from the image and again edged them with black pen. I've then simply overlaid them onto the other image matching up the design carefully. The 5" x 7" white card blank has been randomly stamped with On The Tiles using a grey inkpad and the image mounted onto red card before attaching to the card blank. The sentiment once again comes from Words to Dazzle and Sparkle.


My third design is a December birthday greeting using Hark the Christmas Rose stamped onto White Silk Board with black ink and embossed with clear embossing powder. I've watercoloured with the gorgeous Koh-I-Noor Brilliant Water Colour Palette and mounted onto brown card before attaching to a 6" x 6" ivory card blank. To finish I've wrapped some baker's twine around the fold of the card. The cute birthday greeting comes from the newly launched Christmas stamps, Christmas Circles.


Thanks for stopping by,

Debbie.
 

Monday, 27 July 2015

Kaleidoscope Bird (posted by Judith)

Hello everyone, I have a final project to show you this month using the Birds of Paradise multibuy stamp set.

I have recently taken up crocheting, and love the brightly coloured blankets with the variation of patterned motifs spreading across from one side to the other. My background uses one of the little motifs from the stamp sets, and a range of ink colours to replicate this idea. I have added the Damask Panel to rest the bird and cage on, also coloured with the same inks.

Finally, I have added a sentiment taken from the stamp set to complete the card.
 

This layout would look great in black and white, or metallics as well, to create a more masculine card. Thanks for stopping by, Judith xx

Saturday, 4 April 2015

Awesome Orchids - Cards By Florence

Hi everyone

Thank you for stopping by.

I hope you are enjoying the weekend.

Today I would like to share with you two cards made using the new Awesome Orchids clear stamps.

These stamps are an absolute joy to work with.  

A great little set to cover all occasions.


For the card above, I have teamed the Awesome Orchids Set up with the Wisteria Lane Rubber Stamp Set to create the background.


The beauty of the clear stamps is that it is so easy to position the image exactly where you want it to be stamped which works wonderfully when creating borders or edges.
For the background panel, on the card above, I have used the beautiful Damask Panel from the Cling Singles Range.


Thank you for looking

Happy Stamping
Florence x

Sunday, 4 January 2015

Song Thrush and Arched Landscape (by Asha)

Happy New Year, friends and welcome to a brand new year of more crafty goodness from Chocolate Baroque. You've seen the new January release stamps and must agree that they are just LOVELY.

Today I want to share with you a couple of cards featuring the new Cling Mounted Individual Stamps which were released when the new Chocolate Baroque website was launched on December 18th. You can see Glenda's original post here.

My first creation is a fresh and vibrant card showcasing the beautiful Song Thrush Silhouette stamp which I coloured it with watercolours. For the background, I stamped the small leaf from Butterfly Dreams A5 sheet on to a piece of yellow card stock. The sentiment is also from Butterfly Dreams.


The spotlight on my second card falls on the Arched Landscape stamp. This time I coloured the image with alcohol markers. I also did some background stamping using a little stamp from the Fleurs Nouveau A5 sheet. The sentiment is from the Patchwork Landscape A4 sheet.


There are a total of 10 new Cling Mounted Individual Stamps, each one a thing of beauty. I hope you've been inspired to play with yours. As always, swing by regularly for more crafty ideas from the rest of the DT. Details of inks and colours are available on my blog.

Beijinhos,
Asha